It is Week 4 of the semester. You open your laptop. Your desktop is full of random screenshots. Your "Downloads" folder is a mess of unnamed PDFs. You have three different notebooks and you can't find the definition your professor gave last Tuesday.
This chaos kills your grades.
You waste hours looking for files instead of learning. You need a system. You need a digital study hub.
A study hub is one central place for all your study material. It holds your lectures, notes, handouts, and assignments. Everything lives in one spot. You stop searching and start studying.
You can start building your hub right now with Whisprinote. It turns your chaotic lecture videos and audio into organized, searchable notes instantly.
This guide explains how to set up a digital command center for your best semester yet.
Why You Need a Digital Study Hub
Most students treat their files like laundry. They throw them in a pile and hope to sort them out later. "Later" never happens.
A digital study hub solves this. Here is why:
- Speed: You find any document in seconds.
- Context: You see how lecture A connects to reading B.
- Portability: You have your entire semester in your pocket.
- Sanity: You stop panicking before exams.
Step 1: Choose Your "Base" (Cloud Storage)
Your study hub needs a foundation. This is where your raw files live.
Do not save files to your desktop. If your laptop breaks, you lose everything. Use a cloud service. Google Drive, OneDrive, or Dropbox work well.
Here are the next steps:
- Pick one service. Stick to it.
- Create a main folder called "Spring 2025" (or your current semester).
- Inside that, create a folder for each class (e.g., "BIO 101", "ECON 202").
This seems simple. But University of North Carolina research shows that digital clutter increases cognitive load. A clean folder structure frees up your brain for actual learning.
Step 2: Centralize Your Inputs (The Capture Phase)
This is where most students fail. You get information from everywhere. The professor speaks in class. You watch a YouTube video for homework. You read a PDF.
You need to pull all this study material into your hub.
Handling Video and Audio
Lectures are the hardest part to organize. They are long and hard to search. If you just save the video file, you can't "read" it later.
You need a tool to turn that audio into text.
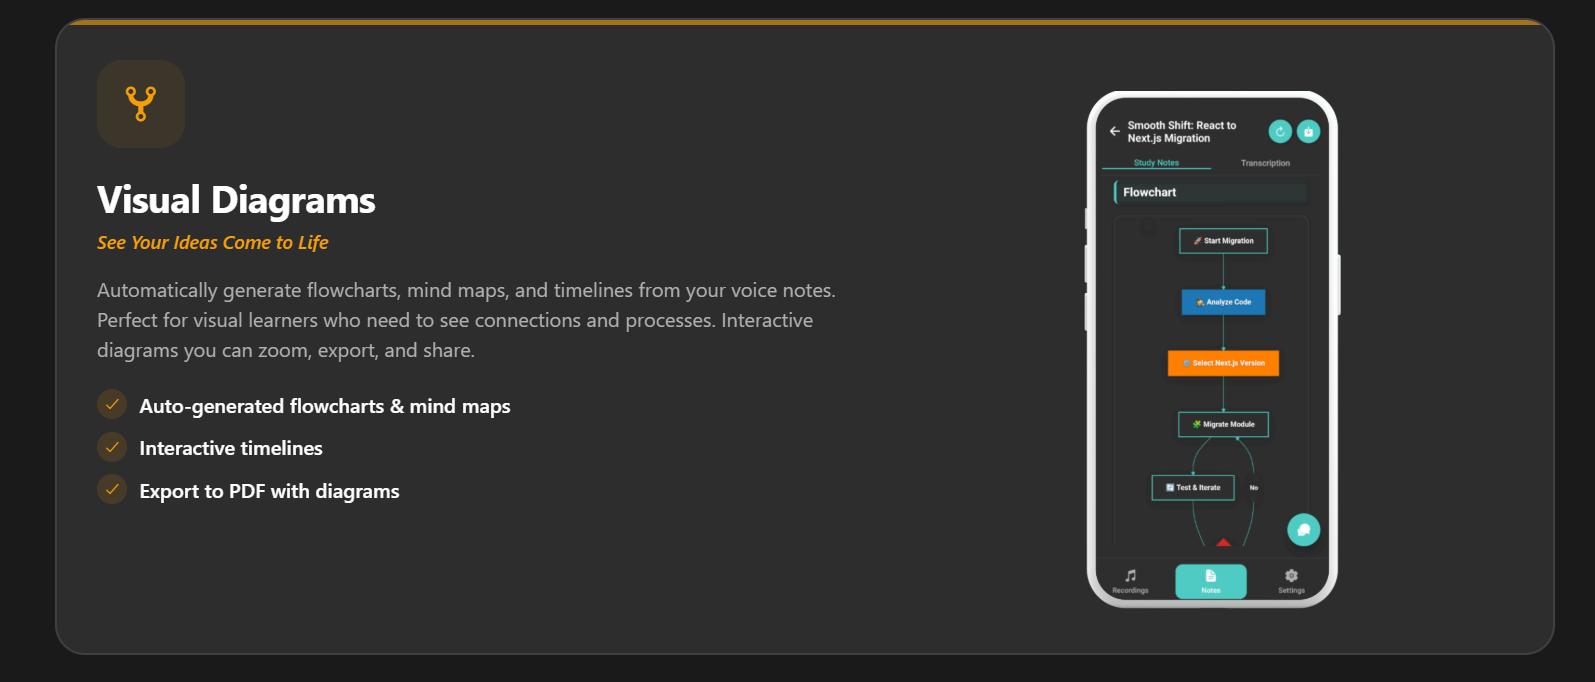
Use Whisprinote. It acts as the gatekeeper for your hub. You record the lecture or paste a YouTube link. The AI processes it. It gives you a clean summary, a full transcript, and even visual diagrams.
Now, that 2-hour video is a searchable document in your hub.
Learn more about capturing video content in our guide on how to get perfect study notes from videos.
Step 3: Connect Your Notes
Storage is for files. A note-taking app is for ideas.
Your note app is the screen you look at while you study. It should link to the files in your storage.
The Workflow:
- Read/Watch: You open a PDF from your Drive or a note in Whisprinote.
- Synthesize: You write your main takeaways.
- Link: You paste a link to the source file.
If you are a medical student, you have hundreds of terms to memorize. A linked system saves your life. See how this works for heavy workloads in our article on AI note-taking for medical students.
Step 4: The Weekly Maintenance
A study hub is like a garden. You must tend to it.
Set a "Reset Time" every Sunday night. Take 15 minutes.
- Move files from "Downloads" to their class folders.
- Rename files like
YYYY-MM-DD Topic Name. - Check your Whisprinote app. Review your recent recordings. Ask the AI to generate summaries for the week.
 If you want to dive deeper into active study techniques, read our guide on [how to use Whisprinote for effective studying](https://whisprinote.com/blog/how-to-use-whisprinote-for-effective-studying).