If your lecture recordings sound muffled, echo-y, or full of noise, the best app will not save you.
The good news: you only need a few simple settings and one smart habit to get clean audio.
This guide is intentionally simple and practical:
- the 6 settings that matter most
- a quick checklist you can reuse every class
- fixes for the 3 most common problems
The truth: settings matter less than these 3 things
Even if your recorder has zero toggles, you can still improve audio by focusing on:
- distance (closer = clearer)
- direction (point the mic at the speaker)
- levels (avoid clipping distortion)
Everything else is optional.
Mic settings checklist (save this)
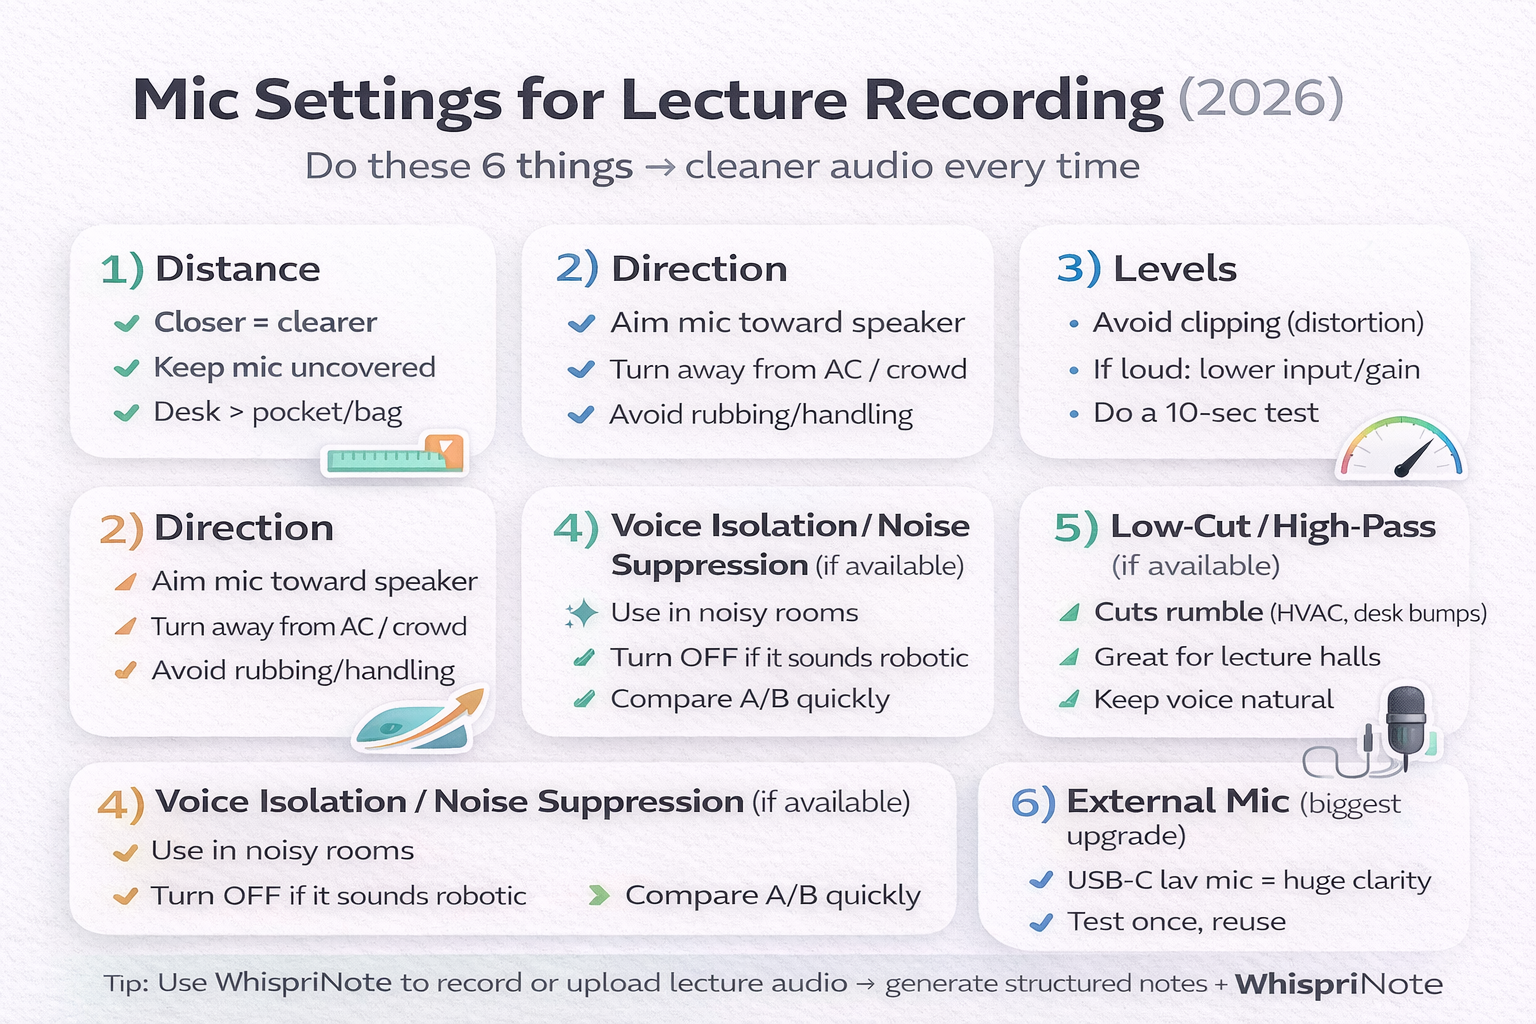
The fastest clear audio setup (60 seconds before class)
- Turn on Do Not Disturb or Focus
- Put the phone on the desk (not a pocket or bag)
- Point the mic toward the front
- Record 10 seconds, replay once
- If it sounds bad: move closer (this beats any setting)
The 6 mic settings that actually help (and when to use them)
1) Distance (the number one clarity booster)
Goal: get the mic closer to the speaker, not closer to your notebook.
Do:
- desk or table placement
- mic uncovered
- front-middle seat when possible
Do not:
- pockets, bags, under papers (muffled)
2) Direction (aim away from noise)
If your room has loud sources (AC vent, hallway, chatty section), rotate the phone or mic so the noise is behind it.
Quick tip:
- If you must sit near noise, aim the mic so the speaker is in front and the noise is off to the side or back.
3) Levels or gain (avoid clipping)
If audio is harsh and crackly, that is usually clipping (input too loud).
Fix:
- lower the input level (if your app allows)
- move the phone slightly farther away
- avoid placing the mic right next to laptop fans or tapping surfaces
Rule: you can boost quiet audio later, but you cannot fix clipped distortion.
4) Voice Isolation or Noise Suppression (if available)
Use it when:
- the lecture hall has constant background noise
- people nearby are talking
Turn it off when:
- it makes the voice sound robotic
- it pumps the volume up and down
Best method: do a 10-second A and B test once, then stick with the winner.
5) Low cut or high pass filter (if available)
This reduces low-frequency rumble like:
- HVAC
- desk bumps
- footsteps
Use it when:
- the recording has a boomy or rumbly sound
- you are recording on a table that gets bumped